In this article we will learn a way by which we can send the website query data or website contact form data directly to the telegram chatbot, through the simple javascript API method we can Send website query to telegram bot, To achive this we are going to create simple constact form or a website query from and on submit of that we will validate and Send message from website to telegram bot through javascript,
This is the same process as we send the user query to the website query email so the website admin can resolve the user query and get in tough with them.
In this project we simply need to create a contact form in html and we need to play with telegram chatbot api, to access the telegram API we need to get the API access from Telegram BotFather, let understand somethign about telegram BotFather
What is Telegram BotFather
Telegram BotFather is the admin of all your bot, thought this you can manage all your bots and able to get the authentication to that perticuler bot on other word, It is a special bot on the telegram messaging platform that allow users to create and manage the other bots
How to create new bot in telegram
Below are the steps by which you can create a new bot in telegram
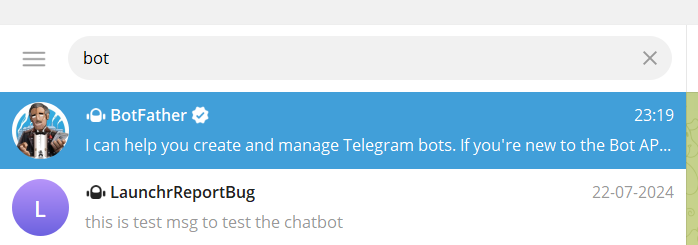
1. Go to you search in telegram and type BotFather as shown in image below.
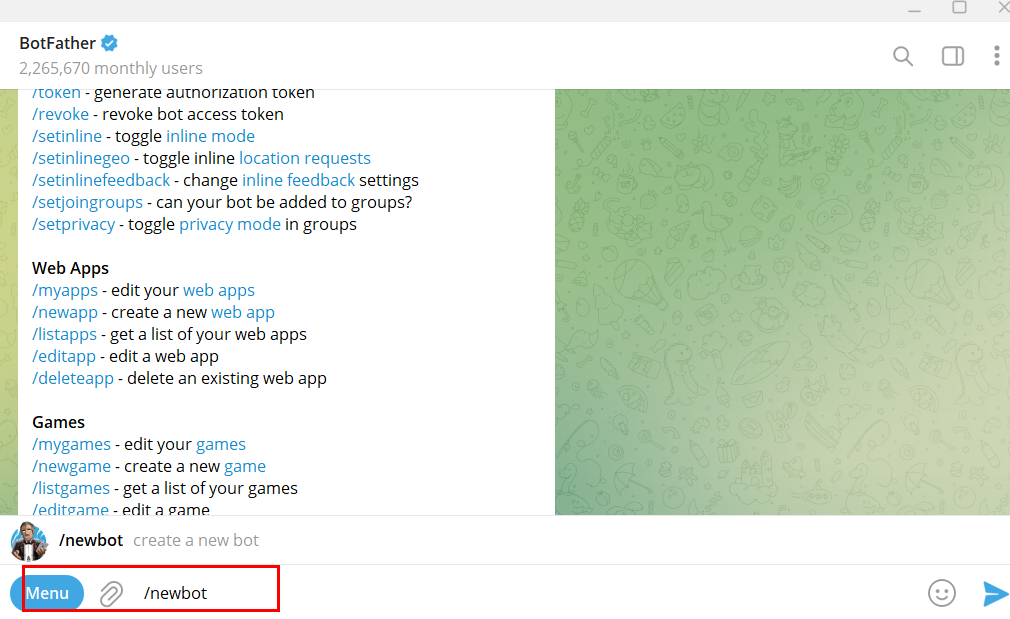
2. Now open BotFather and type /newbot in message and press enter input as shown in image below
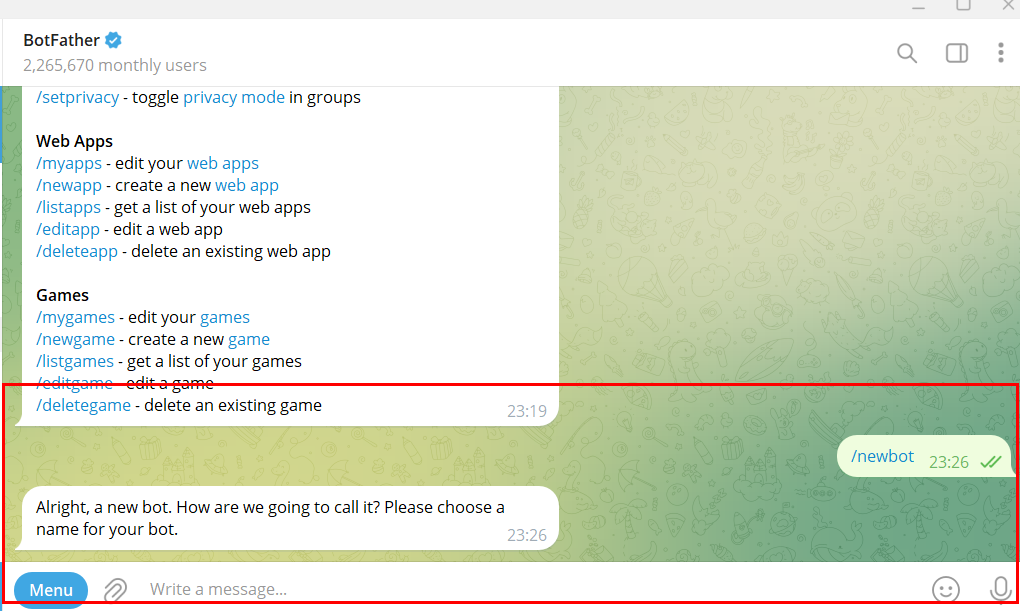
3. When you send the above command then as a chatbot response it will ask for new bot name as shown below
After entering the name it will ask for the new username for the chatbot as shown in beow image, also it will show the below message and you need to take care your user name must contain the bwlo nameing format
Good. Now let’s choose a username for your bot. It must end in bot. Like this, for example: TetrisBot or tetris_bot.
4. After entering the username you weill see the response as shown in below image
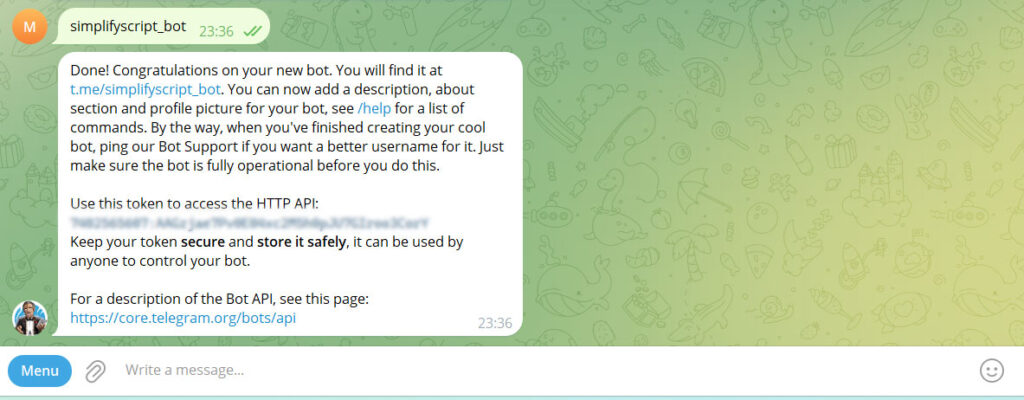
By above steps you can create a new bot in telegram , the BotFather also provided the Authentication token which you can see in above image that is bllured for security resons, Now we will learn how we can Send website query to telegram bot
Send website query to telegram bot
To send query to the chatbot we must need the chat id for that, and to know your chat id you need to send nessage to your chatbot as shown in image below.
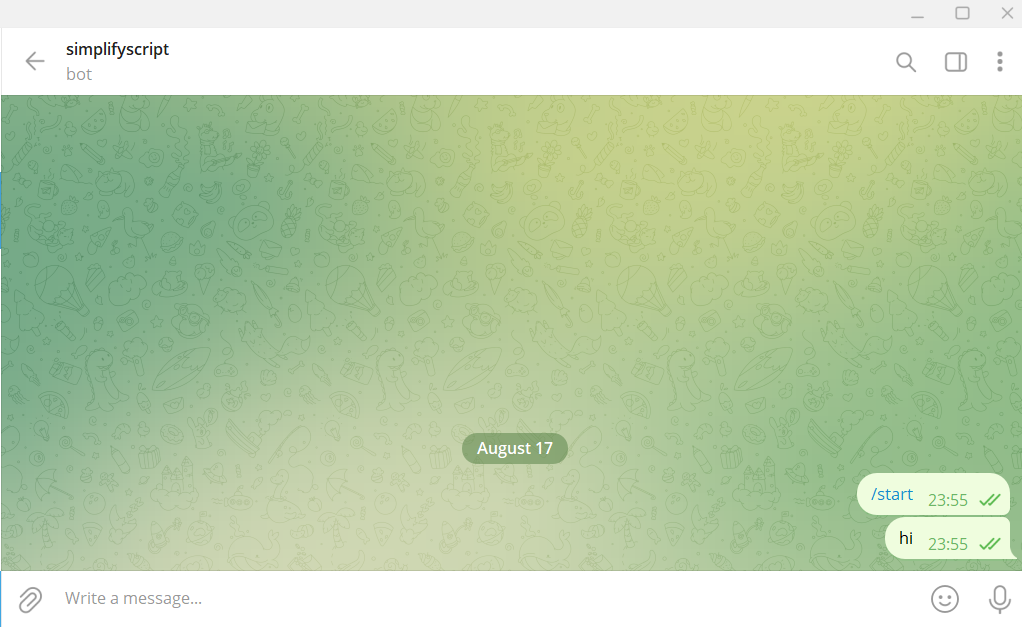
Once you send message you neew to hit simple below api url
https://api.telegram.org/bot<YourApiToken>getUpdates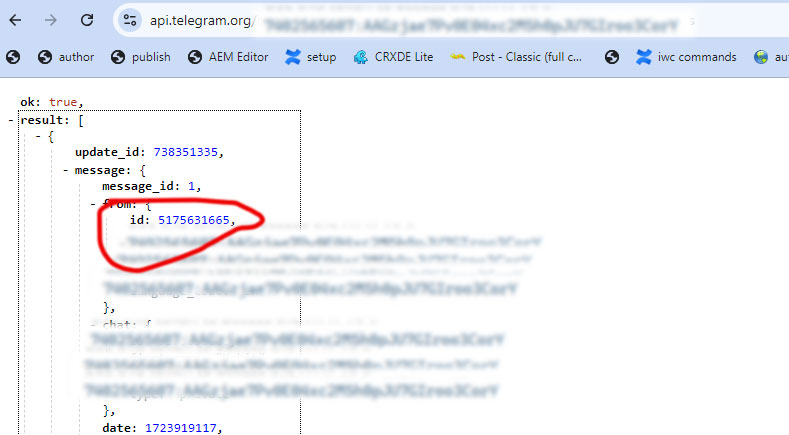
In above image highlighted one is chat id.
Now you will got the chat id and API toke , so by using the chat id and token we can send website query to chat bot
const token = '7383245069:AAErlM91wWcTH-G0vs1-E3_i4bMz49Tp8Zo';
const chatId = '20240817235409';
const textMessage = 'this is test msg to test the chatbot';

const url = `https://api.telegram.org/bot${token}/sendMessage?chat_id=${chatId}&text=${encodeURIComponent(textMessage)}`;

fetch(url)
    .then(response => {
        if (!response.ok) {
            throw new Error('Network response was not ok');
        }
        return response.json();
    })
    .then(data => {
        alert('Comment sent successfully!');
        document.getElementById('commentText').value = '';
    })
    .catch(error => {
        console.error('There was a problem with the fetch operation:', error);
    });
In above code we have stored the below variable
token: Stores the bot token.chatId: Stores the chat ID.textMessage: Stores the message text.
Also if you can to send some picture by uploading in to the form data you can also do so by using below code
 <input type="file" id="imageInput" />
 <button id="sendButton">Send Message</button>
<script>
        const token = '7383245069:AAErlM91wWcTH-G0vs1-E3_i4bMz49Tp8Zo';
        const chatId = '20240817235409';
        const textMessage = 'this is test msg to test the chatbot';

        document.getElementById('sendButton').addEventListener('click', () => {
            const imageInput = document.getElementById('imageInput');
            const file = imageInput.files[0];

            if (!file) {
                alert('Please select an image file.');
                return;
            }

            const url = `https://api.telegram.org/bot${token}/sendPhoto`;

            const formData = new FormData();
            formData.append('chat_id', chatId);
            formData.append('caption', textMessage);  // The text message to send with the image
            formData.append('photo', file);  // The image file

            fetch(url, {
                method: 'POST',
                body: formData
            })
            .then(response => {
                if (!response.ok) {
                    throw new Error('Network response was not ok');
                }
                return response.json();
            })
            .then(data => {
                alert('Image and message sent successfully!');
                imageInput.value = '';  // Clear the file input
            })
            .catch(error => {
                console.error('There was a problem with the fetch operation:', error);
            });
        });
    </script>
