In an increasingly digital world, securing your website is more important than ever. Not only does an SSL certificate protect your visitors’ sensitive data, but it also boosts your site’s trustworthiness and search engine ranking. Fortunately, getting an SSL certificate doesn’t have to be complicated or expensive. In this guide, we’ll walk you through how to purchase an affordable SSL certificate from SSLS.com and set it up on your website using Nginx.
In this article we will learn how we can setup SSL certificate in nginx server, please read the below aticle step by step and impliment in your website.
Why SSL is Essential for Your Website
SSL (Secure Sockets Layer) certificates encrypt the data transmitted between a web server and a browser, ensuring that sensitive information such as passwords, payment details, and personal data is securely handled. Google and other search engines also prefer websites with SSL encryption, which is why switching to HTTPS can improve your SEO.
Purchase an SSL Certificate from SSLS.com
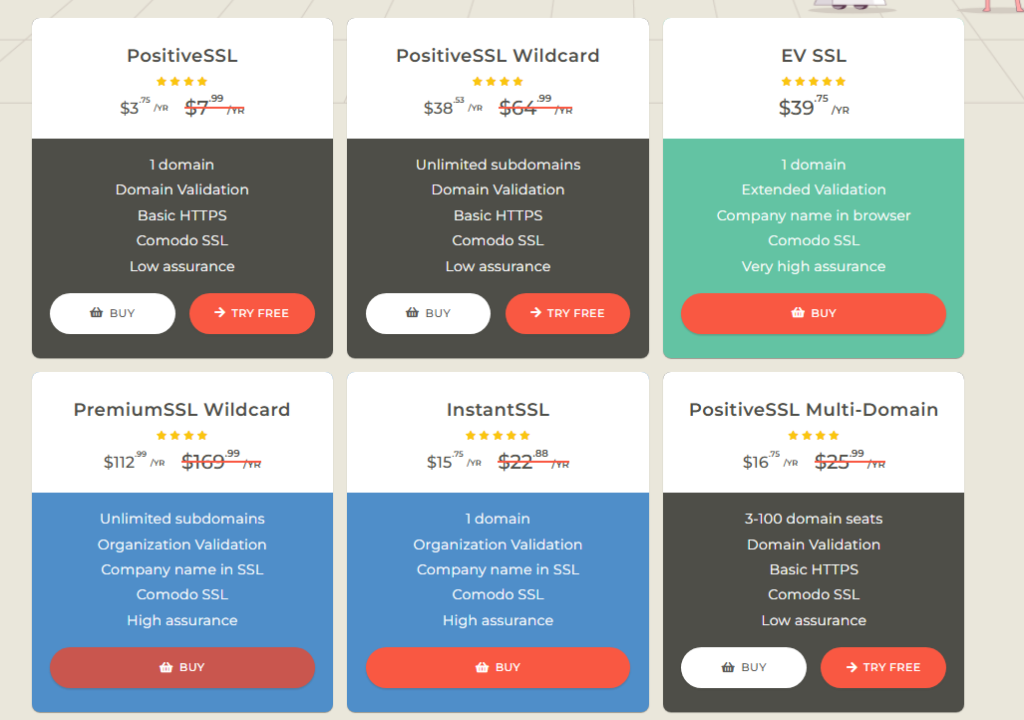
The first step is to get an SSL certificate. SSLS.com offers a variety of SSL certificates at different price points, starting at just around $5 for a basic, single-domain certificate. Here’s how to get started:
- Visit SSLS.com
Go to SSLS.com and browse through the available options. If you’re only securing a single website, the basic SSL certificate will suffice and is cost-effective for personal or small business websites. - Choose Your SSL Package
Select the package that best suits your needs. The “Single Domain SSL” is perfect for securing a single website, while other options, like Wildcard SSL, are more suitable if you need to secure multiple subdomains. - Order and Configure the SSL Certificate
After purchasing, SSLS.com will guide you through the process of generating a CSR (Certificate Signing Request) and verifying your domain ownership. Follow the steps carefully to complete the process. - Download Your Certificate Files
Once the installation is complete, SSLS.com will provide you with the SSL certificate files you need to install on your server. These typically include:- Your SSL certificate file (
.crt) - Your private key file (
.key) - Intermediate certificates (if applicable)
- Your SSL certificate file (

Step 1: Connect to Your VPS and Prepare Nginx Configuration
Before you can install the SSL certificate, you need to access your server and modify the Nginx configuration to enable HTTPS. Follow these steps to get started:
Step 1.1: Log in to Your VPS via SSH
First, you’ll need to log in to your VPS server where your website is hosted. You can do this using SSH and a tool like PuTTY or directly from the terminal on your local machine.
- Using PuTTY (Windows):
- Open PuTTY and enter your server’s IP address in the Host Name (or IP address) field.
- Click Open to start the connection.
- Log in with your username (usually
rootor another user) and password.
- Using Terminal (Linux/macOS): Open a terminal window and run the following command, replacing
your_usernameandyour_server_ipwith your actual credentials:bashCopy codessh your_username@your_server_ip
Once you’re logged in, you’ll be able to configure your server.
Step 1.2: Navigate to the Nginx Configuration Directory
Once logged in, you’ll need to navigate to the directory where Nginx stores its configuration files. The configuration files for your site are typically located in /etc/nginx/sites-enabled/ on most Linux-based servers. Here’s how to navigate to this folder:
bashCopy codecd /etc/nginx/sites-enabled
This will change your current directory to where the Nginx configuration files are stored.
Step 1.3: Edit the Nginx Configuration File
Next, you’ll want to edit the configuration file for your website. The default Nginx configuration file might be named default.conf or could be specific to your site, such as blacklemon.app.conf. To edit the configuration, you can use a text editor like nano. If the file is named default.conf, run:
bashCopy codesudo nano default.conf
This command opens the default.conf file in the nano text editor with elevated privileges (using sudo).
If the file is named differently, replace default.conf with the correct filename for your configuration.
Step 2: Install the SSL Certificate on Your Server
Once you have your SSL certificate files, it’s time to configure your server to use SSL. This guide assumes you’re using Nginx to serve your website. Follow these steps to set up SSL.
1. Redirect HTTP to HTTPS
The first thing you’ll want to do is ensure that visitors are automatically redirected from HTTP (insecure) to HTTPS (secure). This is important for both security and SEO. Add the following code to your Nginx configuration for your domain:
server {
    listen 80;
    server_name blacklemon.app;  # Replace with your actual domain

    # Redirect HTTP requests to HTTPS
    return 301 https://$host$request_uri;
}
This configuration listens for requests on port 80 (HTTP) and automatically redirects them to HTTPS on port 443, ensuring that all traffic is encrypted.
2. Set Up SSL for HTTPS Traffic
Next, you’ll configure Nginx to serve HTTPS traffic. Here’s how you can set up SSL for your domain (blacklemon.app):
server {
    listen 443 ssl;
    server_name blacklemon.app;  # Replace with your domain

    # SSL Certificate Configuration
    ssl_certificate /home/username/cert/fullchain.pem;  # Path to your SSL certificate
    ssl_certificate_key /home/username/cert/privatekey.pem;  # Path to your private key

    # Optional: Improve SSL configuration for security
    ssl_protocols TLSv1.2 TLSv1.3;
    ssl_ciphers 'HIGH:!aNULL:!MD5';
    ssl_prefer_server_ciphers on;

    # Optional: Add security headers
    add_header Strict-Transport-Security "max-age=31536000; includeSubDomains; preload" always;
    add_header X-Content-Type-Options "nosniff" always;
    add_header X-XSS-Protection "1; mode=block" always;
    add_header X-Frame-Options "SAMEORIGIN" always;

    # Serve your website content
    location / {
        root /home/username/website/dist;  # Path to your website's root directory
        index index.html;  # Default index file
        try_files $uri $uri/ /index.html;  # For Single Page Applications (SPA)
    }
}
This block does a few important things:
- It points to the location of your SSL certificate (
fullchain.pem) and private key (privatekey.pem). - It configures Nginx to use only secure versions of TLS (
TLSv1.2andTLSv1.3) and strong ciphers. - It includes important security headers to protect your website from common vulnerabilities like clickjacking and cross-site scripting (XSS).
- It serves your website’s content, ensuring that everything is loaded securely via HTTPS.
3. Set Up SSL for Subdomains (e.g., api.blacklemon.app)
If you have a subdomain (like api.blacklemon.app), you’ll need to configure SSL for it as well. The process is nearly identical, except you’ll use a different certificate file if you’ve purchased a separate SSL certificate for the subdomain.
server {
    listen 80;
    server_name api.blacklemon.app;  # Replace with your subdomain

    # Redirect HTTP requests to HTTPS
    return 301 https://$host$request_uri;
}

server {
    listen 443 ssl;
    server_name api.blacklemon.app;  # Replace with your subdomain

    ssl_certificate /home/username/cert/fullchain-api.pem;  # Path to SSL certificate for subdomain
    ssl_certificate_key /home/username/cert/privatekey-api.pem;  # Path to private key for subdomain

    ssl_protocols TLSv1.2 TLSv1.3;
    ssl_ciphers 'HIGH:!aNULL:!MD5';
    ssl_prefer_server_ciphers on;

    # Proxy requests to your backend API (e.g., Hummingbot, Node.js, etc.)
    location /api/ {
        proxy_pass http://localhost:8000/;  # Replace with your backend service
        proxy_http_version 1.1;
        proxy_set_header Host $host;
        proxy_set_header X-Real-IP $remote_addr;
        proxy_set_header X-Forwarded-For $proxy_add_x_forwarded_for;
        proxy_set_header X-Forwarded-Proto $scheme;
    }
}
This block ensures that HTTP traffic to api.blacklemon.app is redirected to HTTPS, and SSL is properly configured for secure communication.
Step 3: Test and Reload Nginx
Once you’ve configured your Nginx server, it’s time to test your setup:
- Test Nginx Configuration
Before reloading Nginx, run the following command to make sure your configuration is correct:Copy codesudo nginx -t - Reload Nginx
If there are no errors, reload Nginx to apply your changes:Copy codesudo systemctl reload nginx - Verify SSL Installation
Open your website in a browser and check that it loads over HTTPS. You should see a padlock icon next to the URL in the address bar, indicating that your SSL certificate is properly installed.


